Gettin' Heady with it!
 |
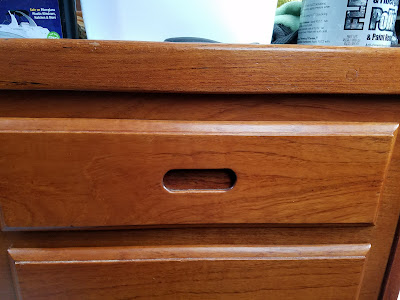
| The ugly Head... Some sort of non-functional kitchen sprayer for a faucet, no shower, weird teak things, and head hoses... |
 After removing the counter top, The first step was cutting out a new one, by tracing the old one, and using my Jigsaw. Then I had to figure out where I wanted the sink to be, by placing a Template I had cut out of paper, an moving it around until I was happy with where it was. Next, cut the hole out, and take the counter to the boat for a dry fit, and to trace the new Sink location.
Now I had to cut out the fiberglass --- Crap! I left my Jigsaw at home! No matter, I have a Dremel on board... it wasn't pretty, and took 10 times longer, but I got the Job Done!
 |
| Finally! got it cut out! |
 |
| The Dry fit is Successful! |
I found a piece that was big enough... by big enough I mean that it needs to be at least a half an inch longer all the way around....

Then I placed the counter top, RIGHT SIDE UP, on top of the formica and traced around it, extending each side by about half an inch.

 |
| All Traced and ready to cut out! |
Now it is time to cut it out. for this, I used a specialized tool called Laminate Shears. If you have ever used sheet metal shears, or tin snips, this will be familiar to you. It is an odd looking tool that has two cutting surfaces.
 |
| Looking at the shears from the side |
 |
| The shears from the front... two cutting surface on either side of a middle piece. |
Using these is like using 2 pairs of scissors placed an eighth of an inch apart at the same time...
 |
| Cutting on the outside of the line. Just like using scissors. |
 |
| This is what the result of the cut looks like... |
 |
| one side done.... |
 |
| All cut out!!!! |
 |
| The dry fit... |
 |
| The tools: Contact spray adhesive, scraps of wood, and a Laminate roller |

After you can touch the Cement without it coming off on your finger, you put down the scrap wood spacers... DO NOT wait TOO long, or the cement won't work. The reason for the spacers is that once both contact cement coated surfaces touch, you are DONE and it is next to impossible to separate them. so you use the spacers so you can position the Formica properly so there is overlap on all sides.
 |
| I laid down 4 spacers here |
 |
| Now I can position the Formica Just right... |
 |
| Using the Laminate roller (Sometimes called a J-roller, because some of them are shaped like a "J" |
 |
| Press down HARD and work toward the edges |
 |
| 2 of the spacers removed, 2 to go... |
 |
| Don't roll over the edge of the plywood or this will happen... fortunately, I think this will be OK. |
 |
| All adhered, ready for trimming off the excess. |

Then it is just a matter of going around the edge to trim the Formica. There are smaller routers, Aptly named, Finishing Routers, that do this job a little easier...

Now I just needed to cut out the hole for the Sink. To do this, I need a starting hole. So I used a Forstner Bit...

Then it was a matter of putting the router in the hole, and going around the inside of the hole.
 |
| The Starting hole... |
 |
| almost cut out |
 |
| All trimmed, ready for the Fiddles! |
 Now I needed a Faucet, after all, what is a sink with out a faucet? Useless! I wanted to have a Single hole
 faucet, as I had very little room to install it. I decided to use this one from Scandvik. It was a little expensive, but I think it will be worth it in the long run, and will look and work a LOT better than that kitchen sink sprayer that was in there before!
First you have to Position it, and it helps to have a Brother in law to point out that unless you had it off center a bit, you wouldn't be able to operate the cold water tap.... Thanks Bro!

Then cut out the hole with a hole saw....
 |
| Cut the Hole |
Then install the Faucet using the manufacturer's Directions...

Install the water supply....

Install the Sink.....

And Voila! a New Head! Kinda....

Then Just install the mounting bracket for the Shower head, and it looks like this!

Now, tell me true, Which head to YOU prefer?
 |
| Before |
 |
| After! |
Nice, bright and no ugly hoses Visible! Note the cover I made for them on the left... That will be a topic for another post....
Let me know what you think by leaving a comment below!!!
Till next time!
JEM


Comments
Post a Comment