Fiddle Fixin'!
Here is a FREE, simple, and virtually seamless way to fix damaged teak. This is a process known as "Dutching-In", according to my friend Robert Salnick
Anyway, I had this Damaged Fiddle Rail on the Table on my Catalina 30. It isn't surprising, being that the table is made of particle board and weighs about a million pounds. But rather than taking the time to fix it properly, the Previous Owner (PO) decided to glue some of it back together using some sort of foamy glue, and to fill in the rather large voids with that "Rock Hard" stuff you can buy at the hardware store... it is a powder that you mix with water and then mold it into place and let it dry, which would be fine if you were going to paint it..... it looked awful on the varnished teak.
 So the first thing to do was to clean out all of that crap, and then re-split the fiddle and re-glue the split with some proper wood glue... I used Gorilla Glue due to its water resistant properties. Then I clamped it tight with Duct tape (yet another use for this wonderful stuff....
 After drying overnight, I was left with this fairly large V shaped void.
The trick here is to use some scrap Teak, and embed it with the grain running in the same direction. I happened to have a couple of teak scraps from the project in the head replacing the counter.
 I cleaned up the void a little bit to get it ready for the patch....
 So I took the scrap, and split it a bit wider than I needed.

 Then it was a matter of whittling down the Piece until it would fit in the void.

Just keep whittling away what doesn't belong and test the fit once in awhile (I would have my other hand on the carving knife, but then how would I take the picture?)
 Just take your time and keep whittling and test fitting...
 and test and so on and so on.
 Eventually you will get it the right size to fit in the void. Take your time, don't hurry it, and enjoy the process of making something with your own two hands....

The test fit is good!

Now glue it in with the Gorilla wood glue.... Notice the patch is a little big and stands proud of the fiddle surface...


The glue has dried, and now it is time to take a sanding block to it so we and get it level with the rest of the fiddle surface.

Now that is a bit more like it! Notice I still have a gap in the middle... Not for much longer!

I learned a couple of things with the earlier process. This time I am going to square out the void. It will make it MUCH easier to Whittle a patch for it.... Here I am starting to square it out...

See what I mean about being easier to whittle a patch? I made this one in no time!

Once I have split the patch to the correct depth, again, thick enough that is stands proud a bit... it is time to glue it in!

After drying, sand with a sanding block.... actually I found using the pad sander from my multi-tool worked great for these small jobs!

I cleaned these up with a little thinner to get a sneak preview of what the might look like when the get some varnish on them... Which one got the facelift?
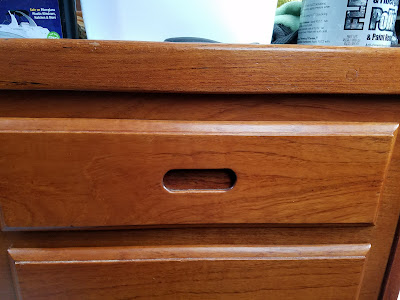
 So now the fiddle is ready to Install on the newly refinished table (a subject for another Blog Post) If you didn't know what you were looking for, you may not notice that this fiddle got a face lift! and it isn't even varnished yet!
While a little time consuming, the results are well worth it! Do you have any wood trim anywhere that needs a facelift of its own?
Now that I teased you with the new table refacing, I will blog on that next! Stay tuned! MUCH MUCH more to come!
JEM
Anyway, I had this Damaged Fiddle Rail on the Table on my Catalina 30. It isn't surprising, being that the table is made of particle board and weighs about a million pounds. But rather than taking the time to fix it properly, the Previous Owner (PO) decided to glue some of it back together using some sort of foamy glue, and to fill in the rather large voids with that "Rock Hard" stuff you can buy at the hardware store... it is a powder that you mix with water and then mold it into place and let it dry, which would be fine if you were going to paint it..... it looked awful on the varnished teak.
So the first thing to do was to clean out all of that crap, and then re-split the fiddle and re-glue the split with some proper wood glue... I used Gorilla Glue due to its water resistant properties. Then I clamped it tight with Duct tape (yet another use for this wonderful stuff.... The trick here is to use some scrap Teak, and embed it with the grain running in the same direction. I happened to have a couple of teak scraps from the project in the head replacing the counter.
Just keep whittling away what doesn't belong and test the fit once in awhile (I would have my other hand on the carving knife, but then how would I take the picture?)
The test fit is good!
Now glue it in with the Gorilla wood glue.... Notice the patch is a little big and stands proud of the fiddle surface...
The glue has dried, and now it is time to take a sanding block to it so we and get it level with the rest of the fiddle surface.
Now that is a bit more like it! Notice I still have a gap in the middle... Not for much longer!
I learned a couple of things with the earlier process. This time I am going to square out the void. It will make it MUCH easier to Whittle a patch for it.... Here I am starting to square it out...
See what I mean about being easier to whittle a patch? I made this one in no time!
Once I have split the patch to the correct depth, again, thick enough that is stands proud a bit... it is time to glue it in!
After drying, sand with a sanding block.... actually I found using the pad sander from my multi-tool worked great for these small jobs!
I cleaned these up with a little thinner to get a sneak preview of what the might look like when the get some varnish on them... Which one got the facelift?
While a little time consuming, the results are well worth it! Do you have any wood trim anywhere that needs a facelift of its own?
Now that I teased you with the new table refacing, I will blog on that next! Stay tuned! MUCH MUCH more to come!
JEM


Comments
Post a Comment